How to draw a hallway in one-point perspective
With a pencil on paper, in 6 Steps: Horizon, Doors & Windows, Contour, Light Shadows, Shadow Shapes and Value Map. Each Step shows what your paper should look like when it's done.
What this drawing teaches: one-point perspective from inside: walls, doors and windows all run to one point.
- 6 Steps
- Medium
- Pencils: 2H, HB, 2B, 4B
- Light from the the window at the far end of the corridor
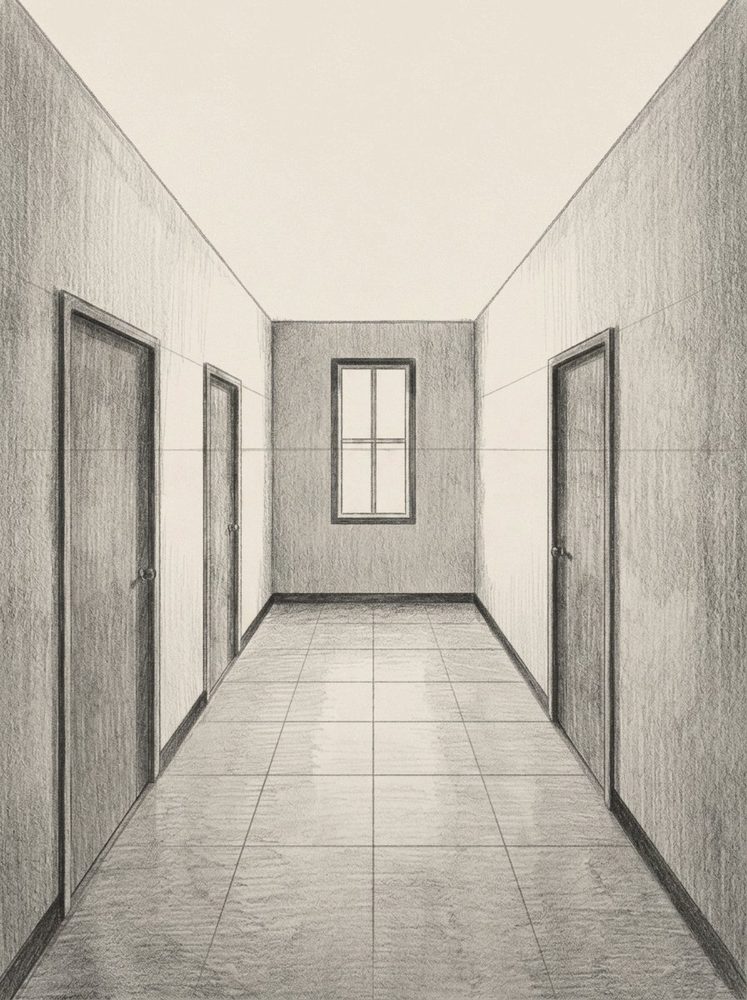
What you need
Pencils 2H, HB, 2B, 4B, an eraser and any drawing paper. If you only have one ordinary HB pencil, start anyway: press lightly for the early Steps and harder for the darks.
The Steps
Step 1Horizon2H
A horizon line at eye level, and the vanishing point or points on it.
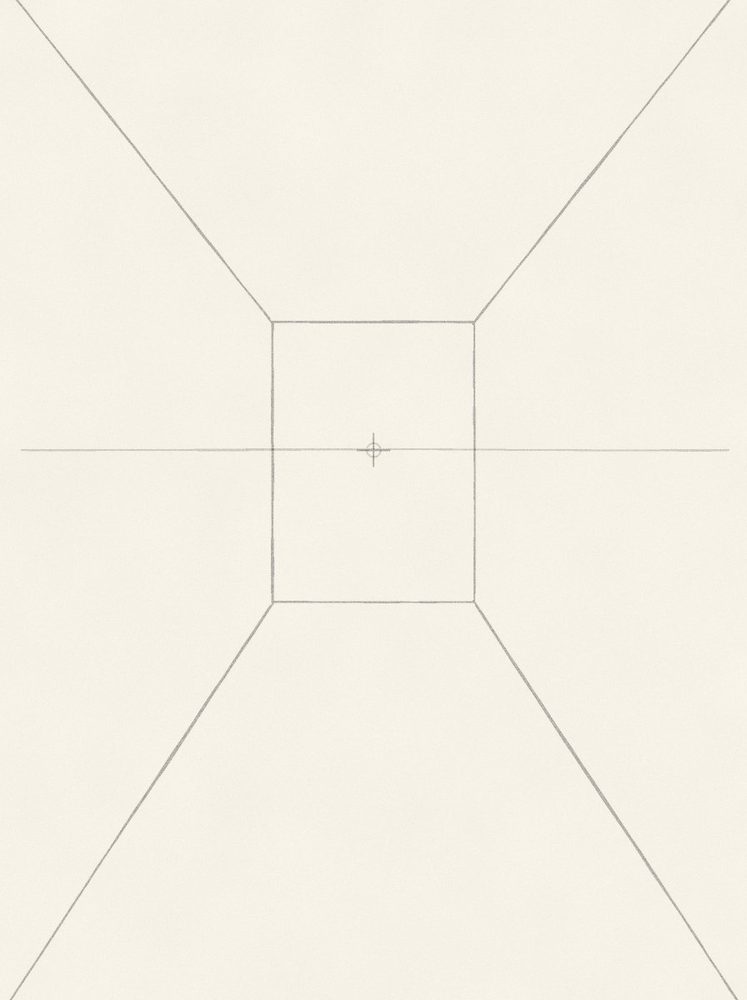
- Draw the horizon a little above the middle and put the vanishing point at its centre.
- Draw the back wall as an upright rectangle around the vanishing point.
- From its four corners, draw the room's edges straight out to the edges of the paper.
Technique: Horizon and vanishing point
Step 2Doors & Windows2H
Doors and windows set into the walls, running to the same points.
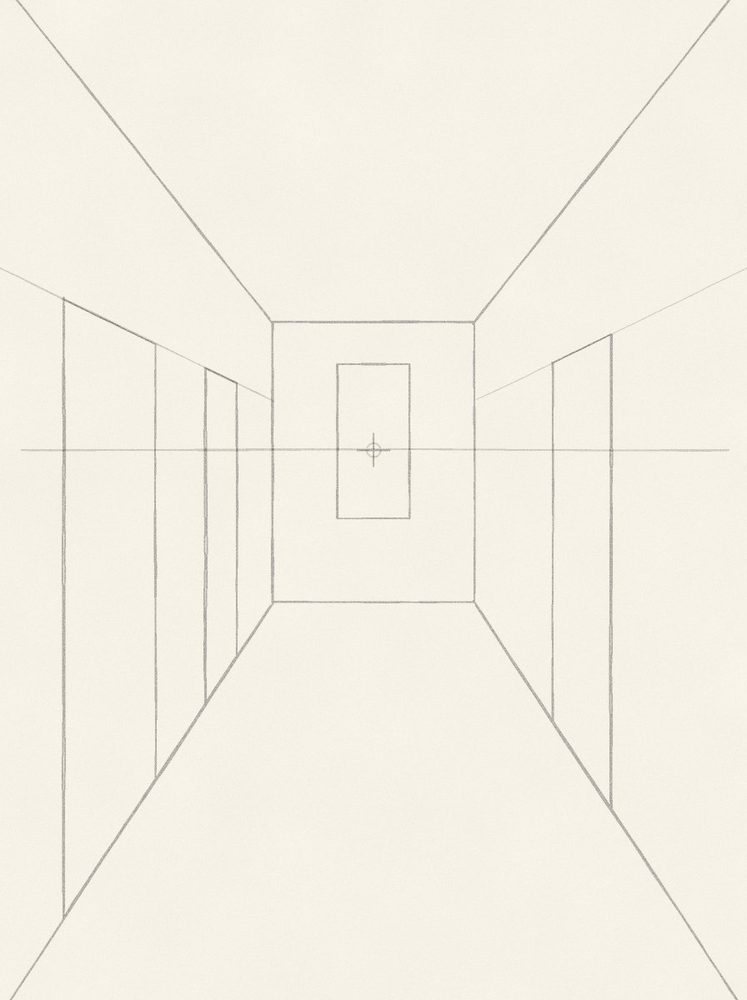
- Door edges are vertical; their tops follow a light line to the vanishing point.
- Doors of the same size get narrower and shorter the farther back they are.
- The window sits flat on the back wall: no perspective, a plain rectangle.
Step 3ContourHB
One clean outline over the construction lines, which stay faint underneath.
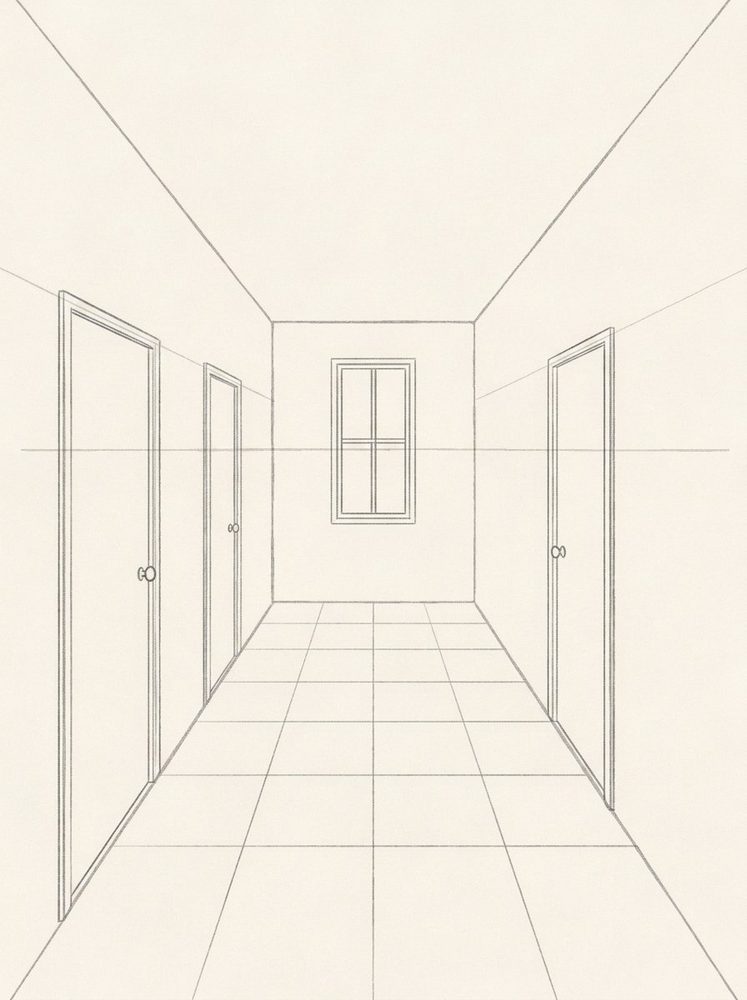
- Draw the walls, doors and window with HB; add frames, handles and the window's cross bar.
- Floor tiles: side joints run to the vanishing point.
- Front joints stay horizontal and get closer together toward the back.
Technique: Spacing with a diagonal
- From here on, the shading
Steps 4 to 6 are where the drawing turns solid: light shadows first, then the shadow shapes and the tones. Their names, pencils and tips are below; the picture of each Step is in Lapis, full screen next to your paper.
Try Lapis free for 7 days Step 4Light Shadows2H
One even, light tone over everything the light doesn't reach directly.
The picture for this Step is in the Lapis app.- Tone the inner sides of the door frames and the strip where the walls meet the floor.
- Barely press; most of the corridor stays paper.
Technique: Light lines
Step 5Shadow Shapes2B
Inside that light tone, the darker shapes: the core shadow and the cast shadow.
The picture for this Step is in the Lapis app.- The light comes toward you from the window at the far end.
- Shade the inner edges of the door frames and a strip along the base of each wall.
- Leave the window bare paper.
Step 6Value Map2B–4B
The drawing sorted into a few flat tones, from the white of the paper to the darkest dark.
The picture for this Step is in the Lapis app.- The window is the brightest value; the back wall around it is mid grey.
- The side walls get darker toward you, away from the window.
- Leave a lighter band down the middle of the floor: the window's reflection.
- Your own photo next?The Shading Planner turns any photo into the same three shading Steps (light shadows, shadow shapes, value map) with a pencil for each tone. Open the Shading Planner
Lapis is an iPhone app that sits beside your paper and shows each Step full screen, with tips, a Pencil Grade and an optional Grid. You draw freehand; one tap to the next Step.
This Lesson is part of Lapis Pro, with 7 days free.
Get Lapis on the App Store How to draw books in one-point perspective
 How to draw a street in one-point perspective
 How to draw a box in two-point perspective