How to draw a Turkish tea glass
With a pencil on paper, in 8 Steps: Envelope, Block-in, Contour, Light Shadows, Shadow Shapes, Value Map, Rendering and Details & Highlights. Each Step shows what your paper should look like when it's done.
What this drawing teaches: transparent glass: see through it, draw its edges and its highlights.
- 8 Steps
- Hard
- Pencils: 2H, HB, 2B, 4B, 6B
- Light from the upper left
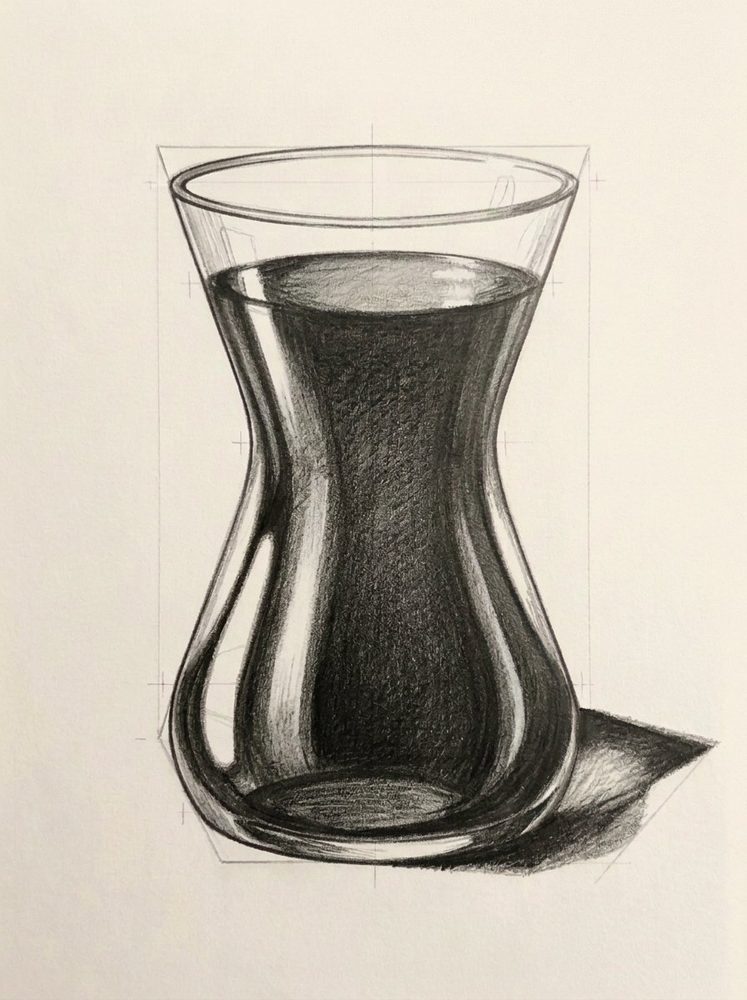
What you need
Pencils 2H, HB, 2B, 4B, 6B, an eraser and any drawing paper. If you only have one ordinary HB pencil, start anyway: press lightly for the early Steps and harder for the darks.
The Steps
Step 1Envelope2H
A few straight lines that box in the whole shape. Get its size and tilt right before any curve.
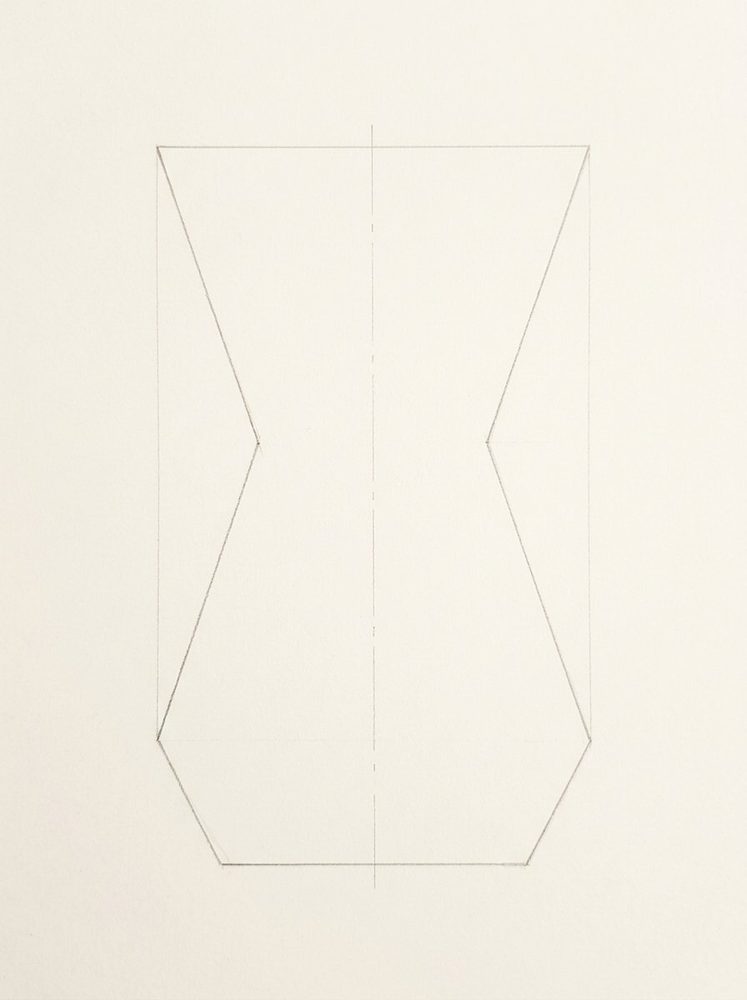
- Draw a vertical centre line, then box the glass with straight lines that go in at the waist.
- Measure: the waist is about halfway up, and the rim is a little narrower than the bulge.
Technique: Measuring with your pencil
Step 2Block-in2H
Simple shapes inside the envelope, already at their final size and place.
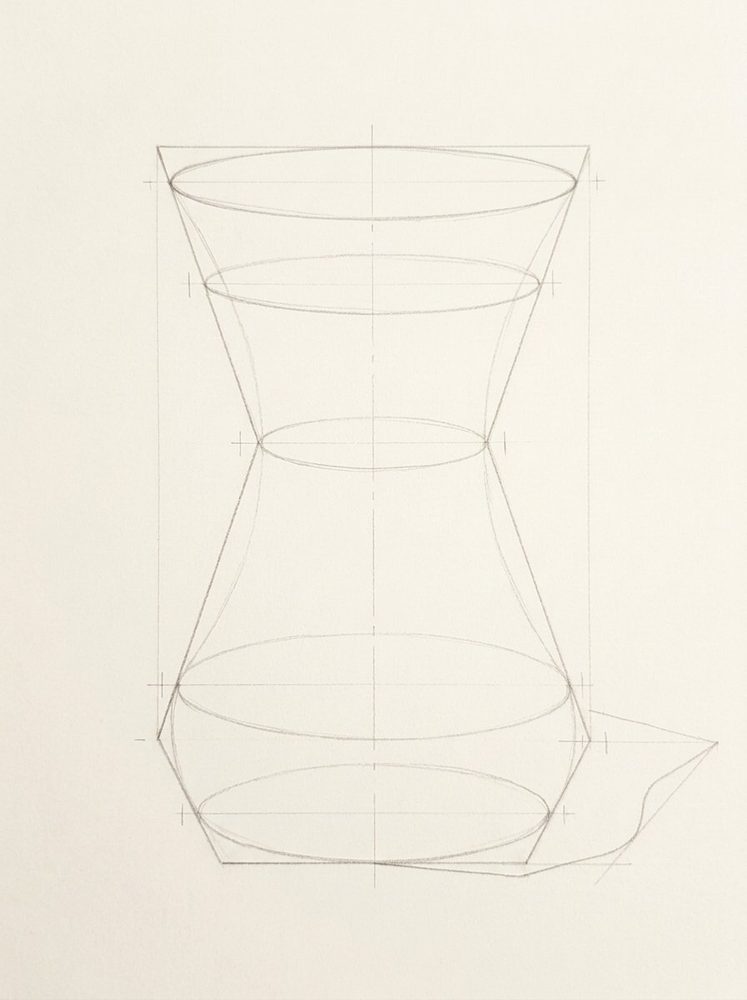
- Place flat ellipses at the rim, the waist, the widest part and the base.
- Draw each ellipse whole, back half too: you can see through glass.
- Add one more ellipse just below the rim for the tea's surface.
Technique: Drawing ellipses
Step 3ContourHB
One clean outline over the construction lines, which stay faint underneath.
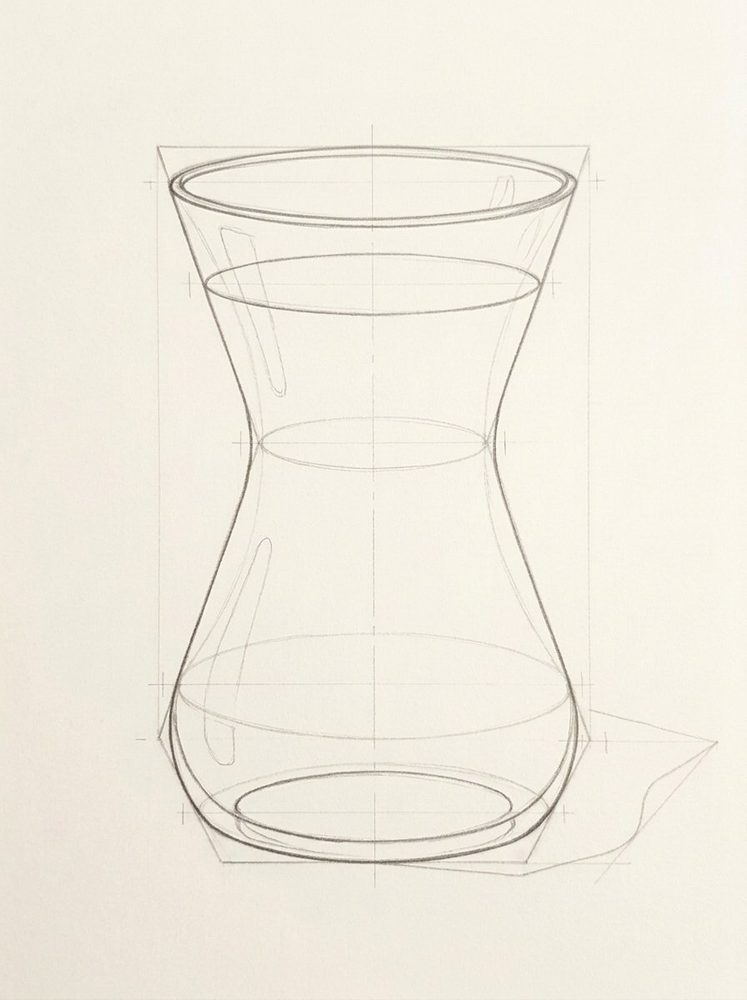
- Switch to HB and join the ellipses with smooth curves: bulge, waist, flare.
- Give the rim a second thin ellipse for the glass's thickness.
- Lightly outline the long highlight strips on the left now.
Technique: Drawing clear glass
- From here on, the shading
Steps 4 to 8 are where the drawing turns solid: light shadows first, then the shadow shapes and the tones. Their names, pencils and tips are below; the picture of each Step is in Lapis, full screen next to your paper.
Try Lapis free for 7 days Step 4Light Shadows2H
One even, light tone over everything the light doesn't reach directly.
The picture for this Step is in the Lapis app.- Lay one pale tone over the tea; the thin bright strips on the glass stay paper.
- Add the cast shadow to the right, just as light.
Technique: Light lines
Step 5Shadow Shapes2B
Inside that light tone, the darker shapes: the core shadow and the cast shadow.
The picture for this Step is in the Lapis app.- Glass has no shadow side: the dark shape here is the tea.
- Fill the tea with one even 2B tone, leaving the highlight strips as paper.
- The empty glass above the tea stays white.
Technique: The family of light
Step 6Value Map2B–4B
The drawing sorted into a few flat tones, from the white of the paper to the darkest dark.
The picture for this Step is in the Lapis app.- The tea is lighter on the left where light passes through, darkest at the right edge.
- The cast shadow is light grey, with a bright spot inside where light comes through the tea.
Technique: Squinting
- Your own photo next?The Shading Planner turns any photo into the same three shading Steps (light shadows, shadow shapes, value map) with a pencil for each tone. Open the Shading Planner
Step 7Rendering2B–4B
The edges between tones softened, so the form turns instead of stepping.
The picture for this Step is in the Lapis app.- Blend the tea into a smooth gradation that follows the round glass.
- Keep the highlights and the glass edges sharp: glass has hard edges.
- Keep the tea's surface a slightly lighter band.
Technique: Smooth tones in layers
Step 8Details & Highlights4B–6B
The last darks and small details, and highlights lifted with an eraser.
The picture for this Step is in the Lapis app.- Re-state the thin glass walls, the rim and the base with crisp lines.
- Press 6B into the darkest tea at the right edge and the waist.
- Lift the highlight strips and the glints on the rim back to white with a kneaded eraser.
Technique: Lifting highlights
Lapis is an iPhone app that sits beside your paper and shows each Step full screen, with tips, a Pencil Grade and an optional Grid. You draw freehand; one tap to the next Step.
This Lesson is part of Lapis Pro, with 7 days free.
Get Lapis on the App Store How to draw a seashell
 How to draw a Turkish coffee pot
 How to draw books in one-point perspective